My DIY NAS Adventure
Preface
This post is a casual account intended for my friends, most of whom are not in the IT industry. For the sake of a broader audience’s reading pleasure, I feel compelled to briefly explain what NAS (Network-attached storage) is. Essentially, it’s a little computer connected to your home router, packed with hard drives (commonly a few TBs in size). With the right software installed, it allows you to back up photos from all family members’ smartphones and computers (with support for face recognition and geolocation tagging), watch high-definition or family-made media files on your TV, and even serve as the brain for your smart home setup. There are commercial NAS solutions like Synology, but many prefer to build their own by piecing together components.
The development boards (or boards for short) I mention below are essentially low-power, miniaturized computers equipped with processors, memory, network cards, etc., often used in industrial applications (industrial PCs, retail touch screens). They come in various brands, models, prices, features, sizes, performance, and power consumption levels, making them treasures for DIY enthusiasts.
Let’s dive in.
The Genesis
My obsession with Raspberry Pi-style development boards led me to discover this board one day while browsing online:
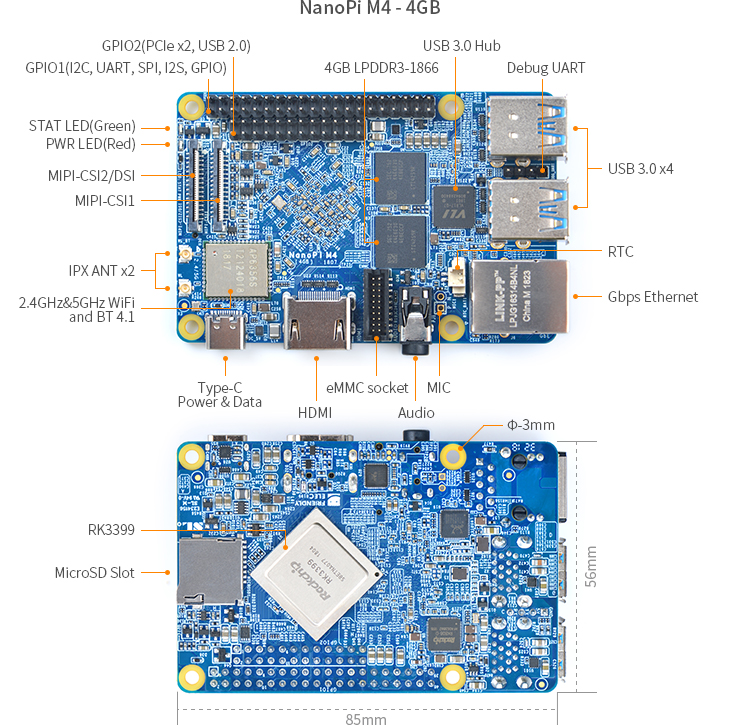
The NanoPi M4 caught my eye, sporting a RK3399 processor from Fuzhou Rockchip and 4GB of RAM, not to mention a PCIe interface… Wait, PCIe? What could that connect to?

Further research revealed three peripherals by the original manufacturer, including a SATA HAT:
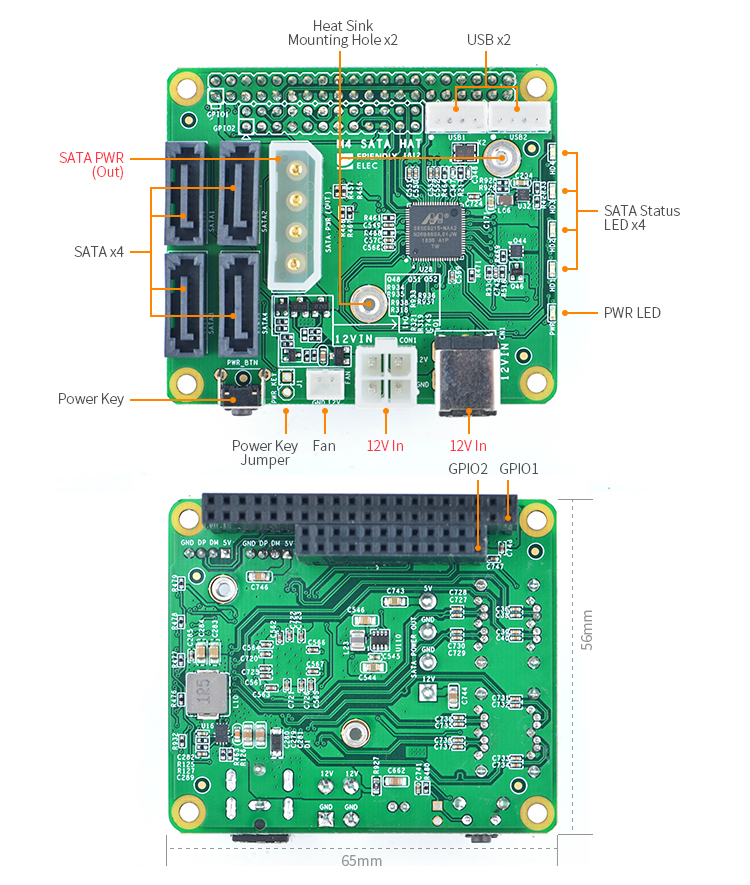
In essence, coupling this “hat” with the aforementioned board and a 12V power supply equips you with an ARM host boasting four SATA ports, perfect for a 4-bay NAS setup! Given humanity’s propensity for repetition, surely someone had already undertaken this venture, and indeed, enthusiasts from Brazil(Carlos Gomes) and Shanghai(傻猫芝麻酱) had not only succeeded but shared their insights. This knowledge bolstered my confidence, setting me on my path to DIY glory.
Sourcing Components
Excitedly, I turned to Taobao(Chinese eBay), only to face complexities—the NanoPi M4 was scarcely available, and the few listings priced it over a thousand yuan. Was it discontinued? This seemed odd. After reviewing articles and forum posts, it became apparent that enthusiasts had adopted this board between 2019 and 2021. Had I missed the boat?

As my quest morphed into an archaeological dig, I resorted to scouring the online second-hand market(Xianyu), eventually striking gold with a brand-new board from a Guangzhou seller for 329 yuan, complete with a 16G eMMC chip and a Wi-Fi antenna. My joy was short-lived, however, as the board refused to boot, leading to a protracted troubleshooting saga that ended with a return.
Undeterred, I resumed my vigil on the secondary market, and fortune smiled upon me three weeks later with a listing from a Shanghai seller: a used NanoPi M4 bundled with a SATA HAT, CPU heatsink, and an SD card for 350 yuan—a package seemingly tailor-made for me. These components, once part of a factory’s arsenal, now promised to rejuvenate my project. Upon their arrival, the setup sprang to life, reigniting my enthusiasm.
Securing the remaining parts was relatively straightforward, involving a series of online purchases and eagerly awaited deliveries:
| Component | Quantity | Price(CNY¥) |
|---|---|---|
| NanoPi M4 4GB RAM | 1 | 350 |
| NanoPi M4 SATA HAT | 1 | Included |
| NanoPi M4 Heatsink | 1 | Included |
| SD Card 16GB | 1 | Included |
| Delta 12V10A Power Adapter | 1 | 28 |
| IDE to SATA 4P Power Cable | 1 | 12 |
| IDE 4P Power Cable | 1 | 6.8 |
| SATA 3.0 Data Cable | 4 | Used |
| Delta Fan 6cm 12V | 1 | 8 |
| Dust Filter Mesh | 1 | 5.5 |
| Case | 1 | Used |
| M2.5 Screws | Various | Used |
| M2.5 Standoffs | Various | Used |
| Total | - | 410.3 |
Crafting the Case
In the DIY NAS journey, devising a custom case seems an obligatory rite. For me, the motivation was primarily the prohibitive cost of commercial cases.

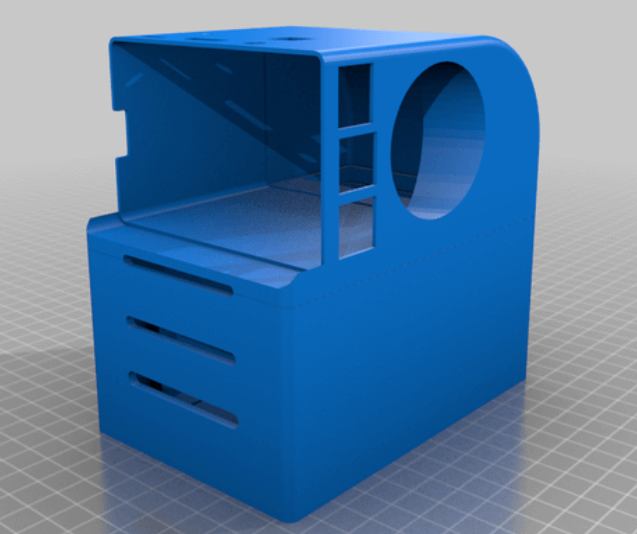
Left with no choice but to take matters into my own hands, I drew inspiration from others who had trodden this path: one enthusiast 3D-printed a case while another used carbon fiber sheets to construct theirs. Impressive feats of CAD skills, craftsmanship, and budget!
Faced with my limitations, a solution presented itself in the form of a camping storage box lying around my home—a perfect fit in size and material, easily modifiable for my needs.
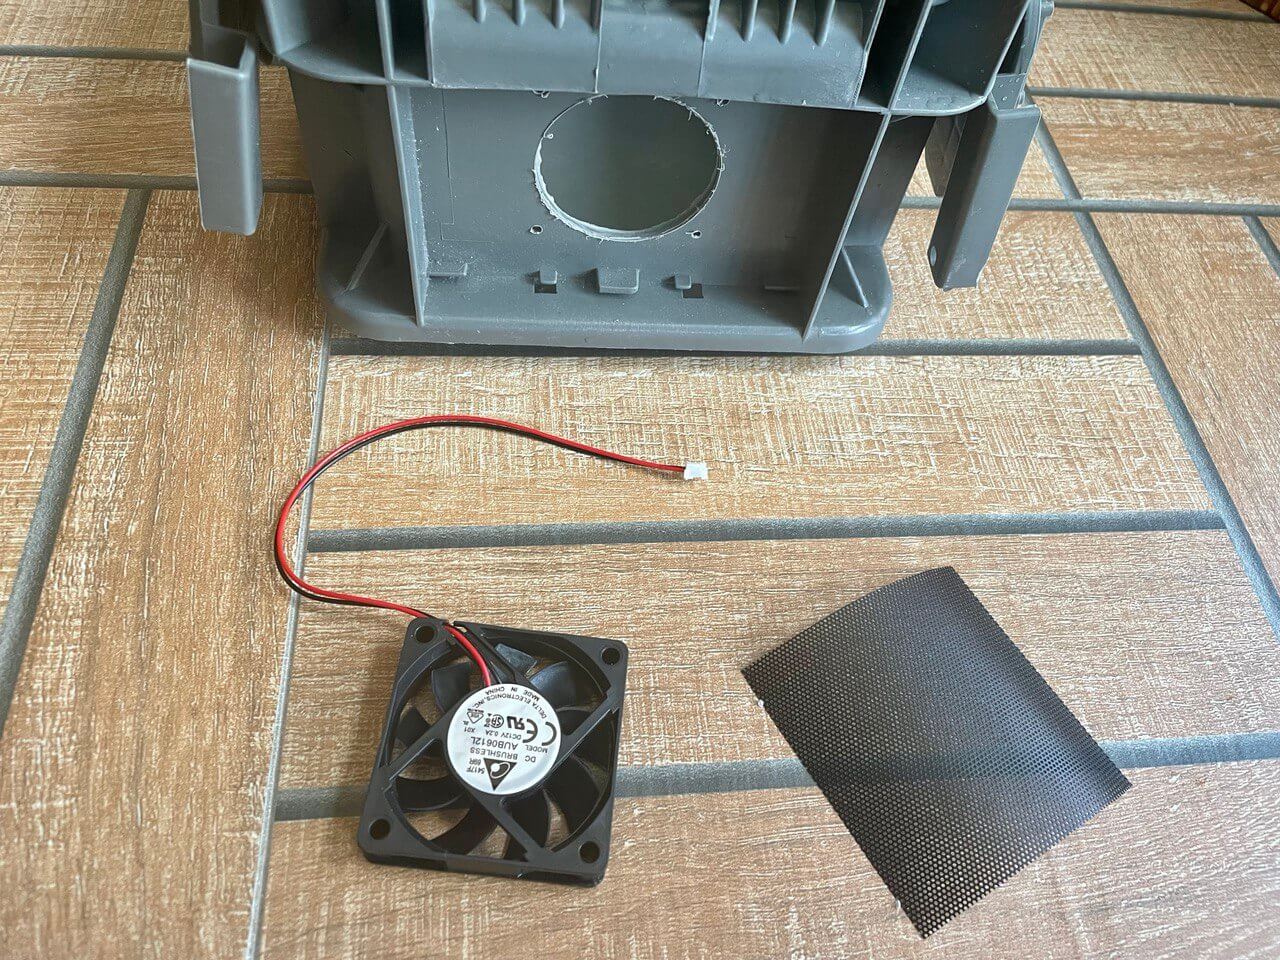
Embracing a DIY spirit, I began by drilling ventilation holes, matching the dimensions of a carefully chosen fan:

Proceeding to cut additional ventilation slots and securing the fan and dust filter with screws:
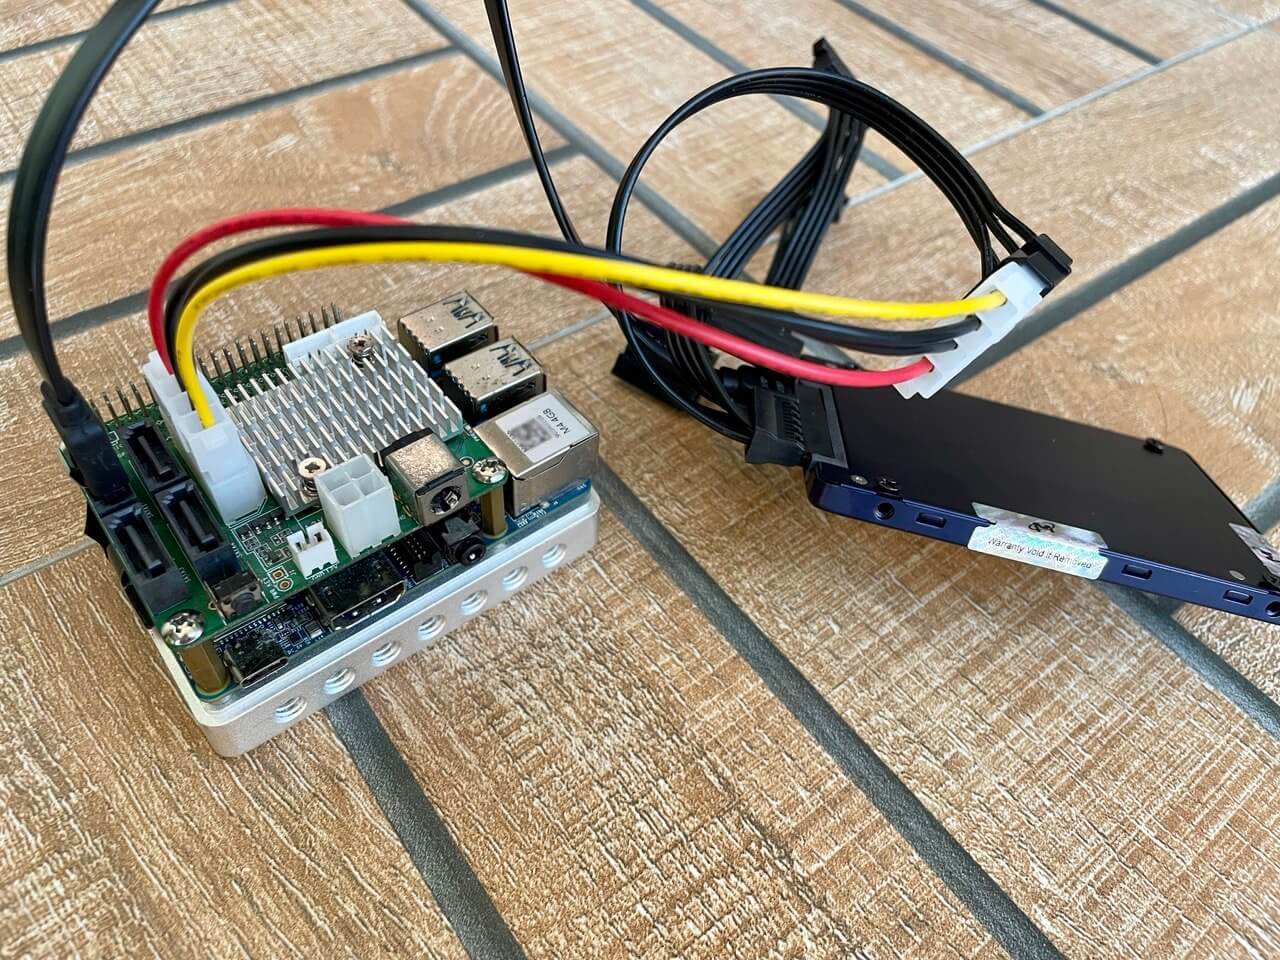
The components and drives were arranged within the case and interconnected, with the fan linked to the development board:
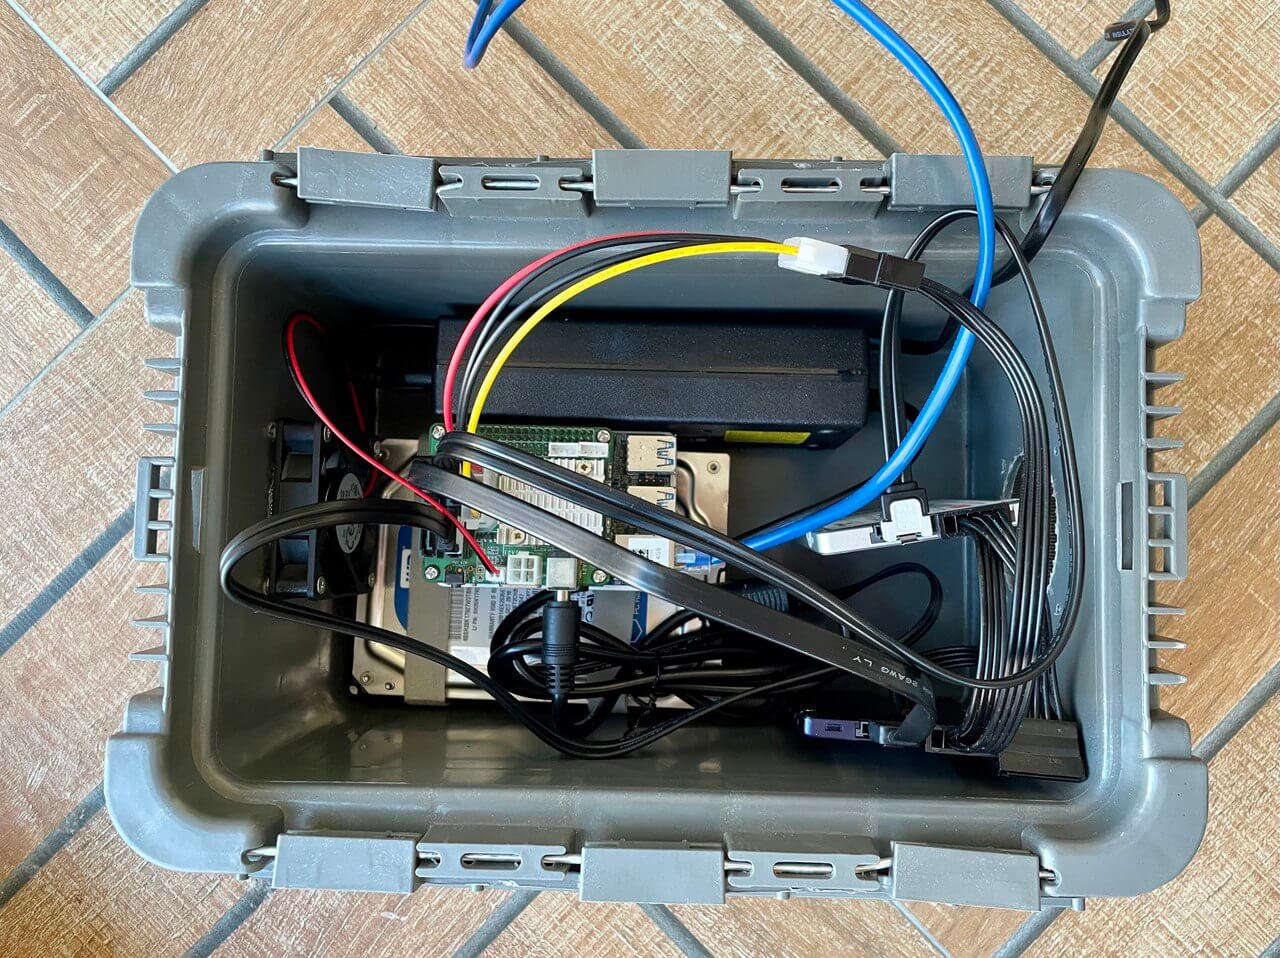
To mitigate potential vibration, I wrapped the mechanical hard drives in non-woven fabric tape. SSD placement was less critical, slotted wherever convenient.
The case, when sealed, compromised airflow, so I opted to leave it open, covered with a dust filter for protection:
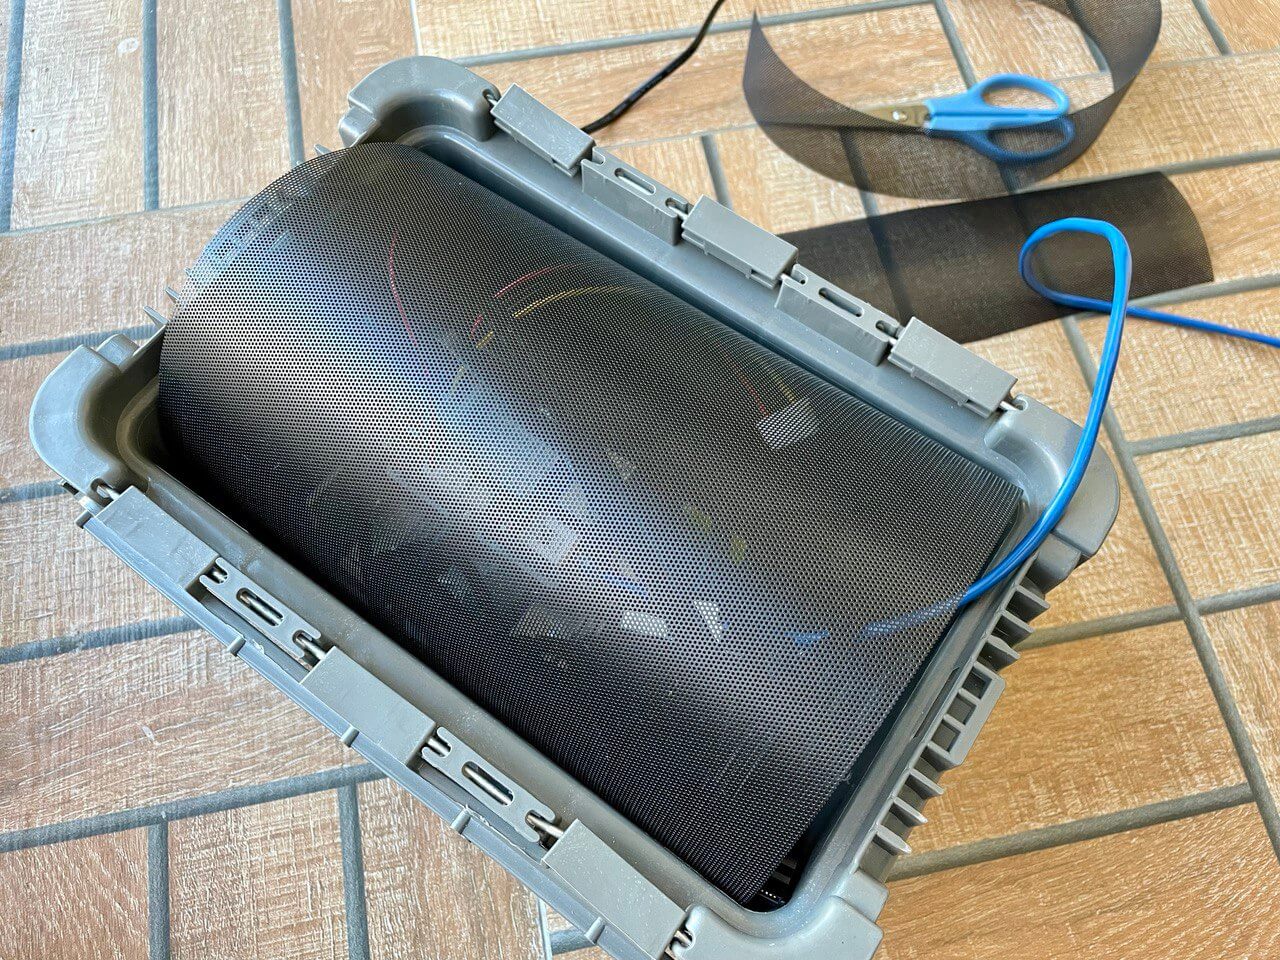
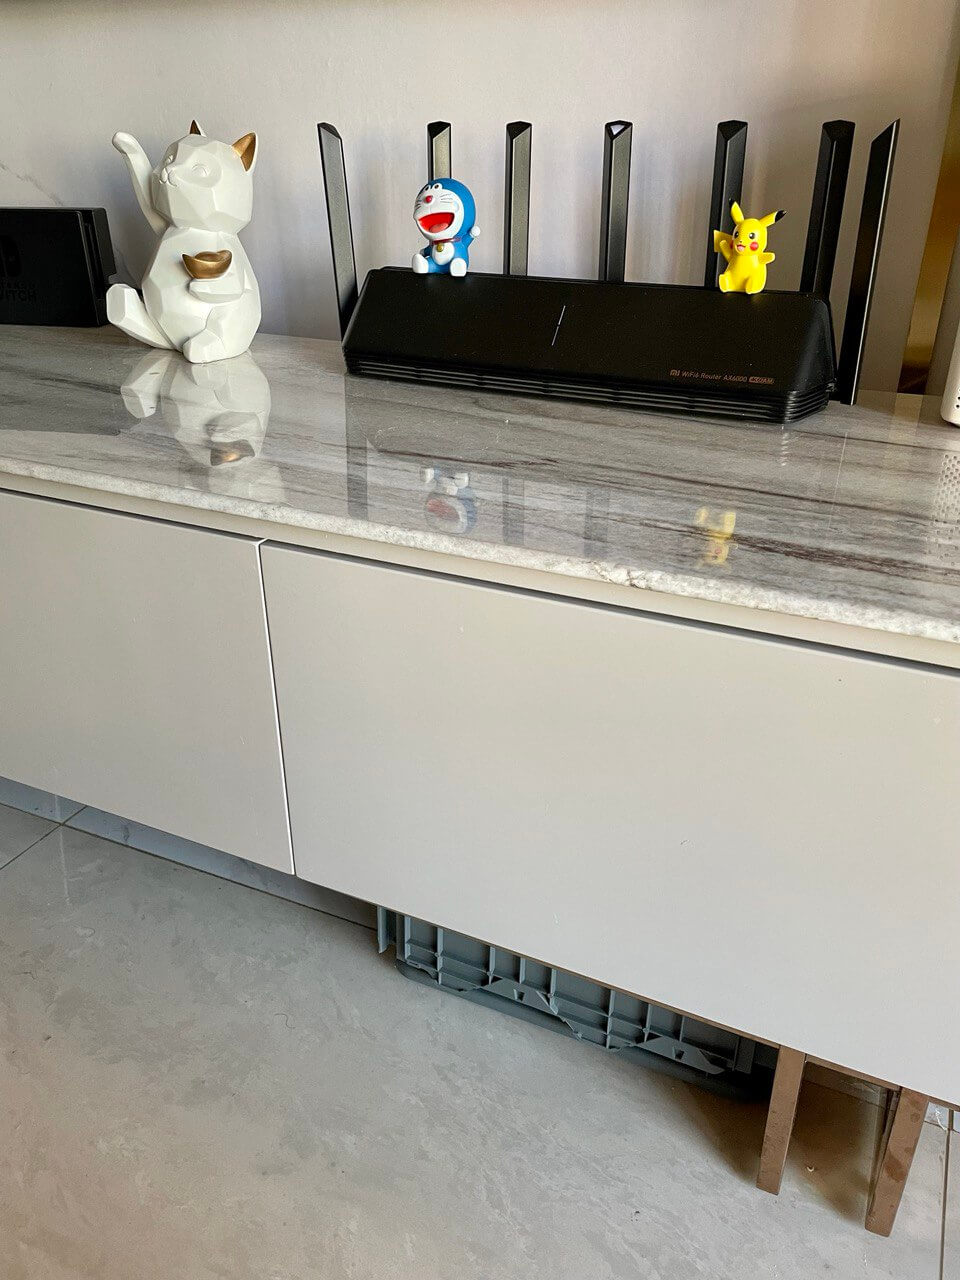
This NAS found its home beneath my TV stand, conveniently near the router for an easy network connection—a perfect setup.
Regarding power management and hot-swapping drives? Let’s not sweat the small stuff:
Powering on was as simple as connecting the adapter, and shutdown occurred upon its removal. Given the infrequency of drive swaps, I opted to overlook these nuances.
System Setup
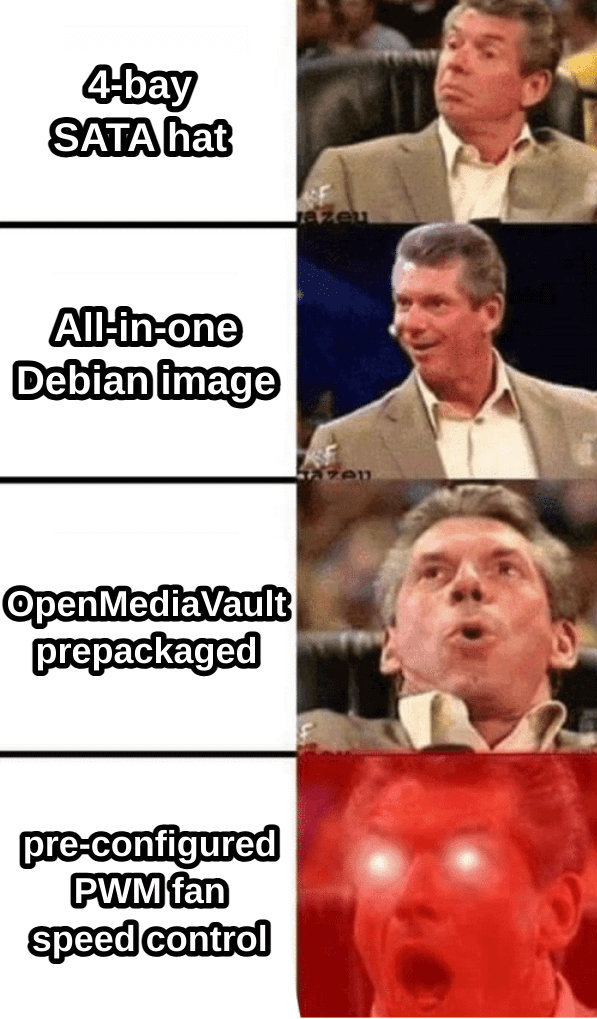
Both the Brazilian and Shanghai enthusiasts recommended the Armbian OS, which, while functional, required additional effort for OpenMediaVault installation and fan speed control via PWM—a prospect that tested my patience.
Fortunately, the developer documentation highlighted an all-in-one Debian image, prepackaged with OpenMediaVault and Docker, and even pre-configured for PWM fan speed control based on temperature—a dream come true for someone looking to minimize setup hassles.
The performance of the budget-friendly fan was surprisingly adequate. Under normal conditions, it operated quietly, and during CPU-intensive tasks, it managed to keep temperatures below 65°C(149°F).
Once the system was up and running, I felt right at home with Debian. I installed a suite of useful applications to maximize the utility of my NAS:
- Immich: An excellent repository for years of photos and videos, offering interesting insights over time through facial recognition and geolocation sorting. It also supports automatic backups from smartphones when connected to home WiFi.
- aria2 with a web interface: Ideal for downloading various resources. Given the NAS’s low power consumption and always-on nature, it can download large files unobtrusively over extended periods.
- Kodi: Installed on the TV and smartphones for streaming downloaded content within the home network.
- Tailscale: Creates a private network over the public internet, allowing remote access to the NAS or sharing resources with friends, regardless of location.
- Restic: Provides an additional layer of security by encrypting and backing up essential files to the cloud.
The NAS also runs custom scripts that cater to my specific needs, underscoring the device’s versatility as a Linux server.
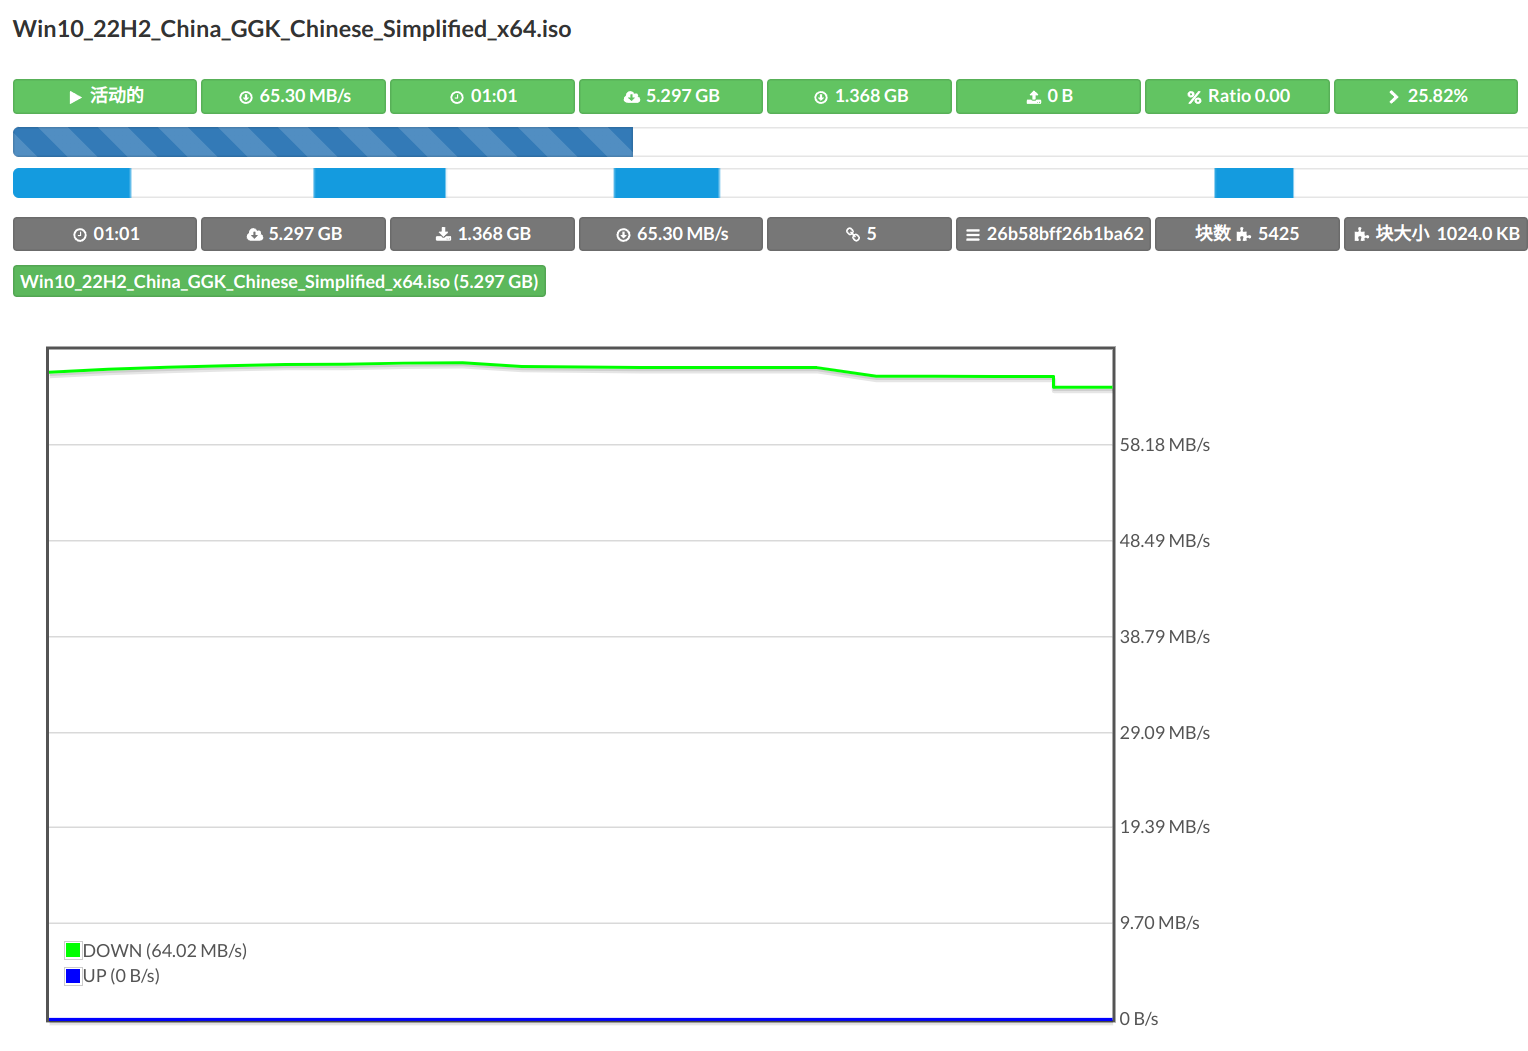
Here’s a snapshot of the download speeds, showcasing the board’s capability to fully utilize my internet bandwidth:
Epilogue
The assembly of this NAS spanned nearly two months, largely due to waiting for deliveries, replacing incorrect components, and deliberating over various options.
The completion brought immense satisfaction and this post marks the end of this adventure, but stay tuned for future endeavors!

